Ballerina Buns!! (sounds kinda dirty :-/)
Have you ever typed into Google "Cute ways to make a ballet bun" or something along those lines? And then you end up getting tutorials for making some sloppy, ballet wanna-be bun instead? Well not anymore :-D This tutorial type post thing is going to be all about cute and interesting ways to spice up your hair for class. (or you could do it for outside the studio as well)
The Classic
We should all know how to make a proper ballet bun with pins and a net and all that other stuff that is just plain torture if you put it in wrong. But in case you are new to the scene or are fed up with having that one bun in class that doesn't look just right, here are some pictograms to help you.
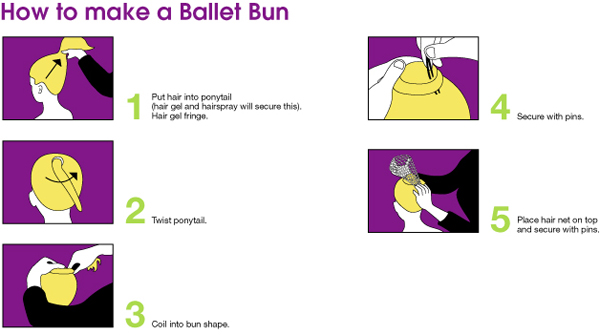
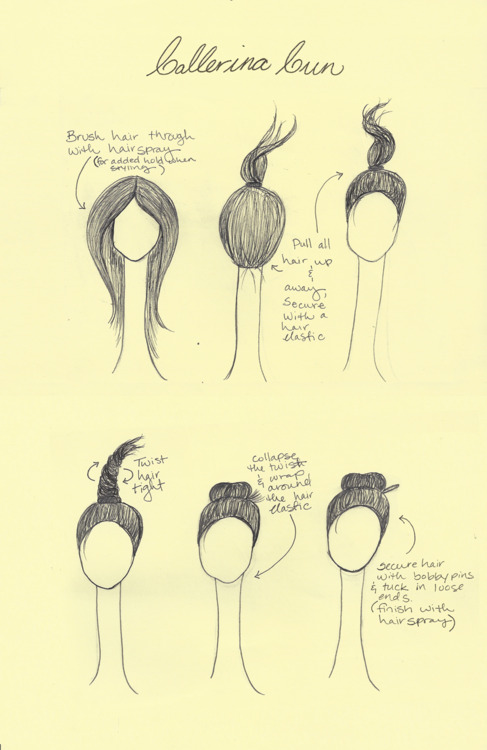
A trick for getting the flattest, most cinnabon shaped bun is how you pin the bun. you take those U shaped pins that you can get at any dance store (not the flat bobby pins, those don't hold) Attack your coil from the top, stick the pin in and over the edge of the hair and pull it back over that peice to tuck the pin into the bun. I call in the Over-Under technique and it is much more effective that just sticking pins in randomly to your head. Also, it hurts wayyyyy less.
Braid into Bun
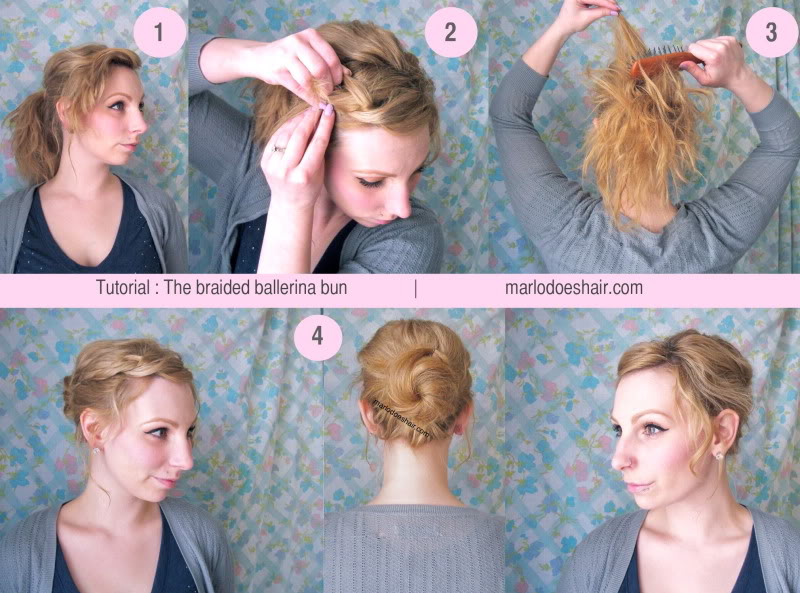
Obviously for dance class you would not have the extra hair hanging out and framing your face. But if this is a look you would sport outside the studio, they go right ahead with the wispies. (it's a word, i swear) A tip with this is to either only braid half of the front section like she is doing in the photo or braid all the hair in front of your ear to keep it nice and neat. Make sure you tie off the braid when you run out of hair and secure the braid in the ponytail before making your bun. If you just bobby pin it next to the elastic and add it to the bun, it will make your bun experience 10 times harder.
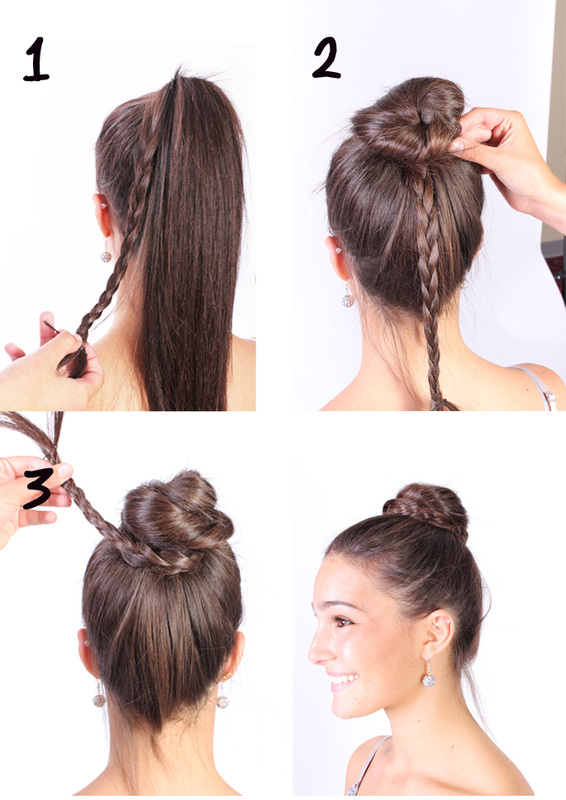
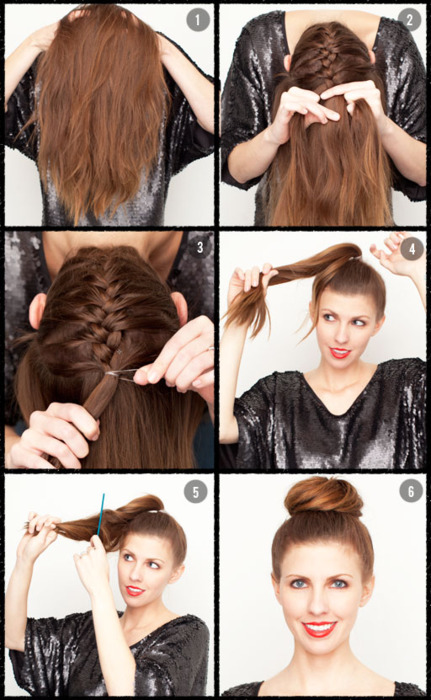
Cross Over Bun
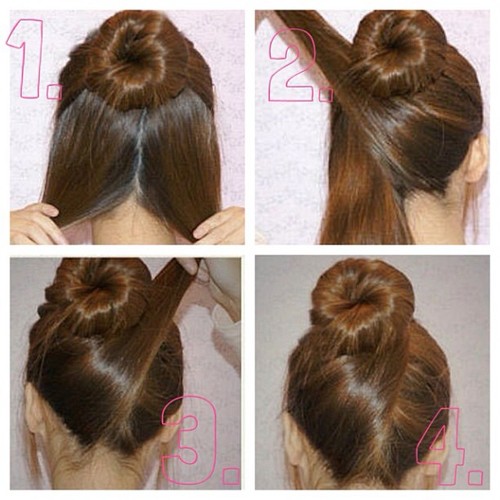
WARNING: THIS LOOK USES A SOCK BUN just thought you should know. Because you make the bun part first, and with only half of your hair, the model has a sock bun, or a doughnut bun as some people call them. You can buy them at places like Sally's or make your own with a (clean) pair of cotton socks. The trick with this look is to only pin half a wrap. That might sound confusing. When you wrap the first chunk of hair around the bun, don't pin the ends of the piece into the bun. Only put pins, say, on the top part of the pre-made bun. That way, you can tuck those ends under the next wrap of the other piece of hair. When pinning the second section, pin all the hair into the bun (all the way around) It made my life so much easier when I tried this hairstyle.
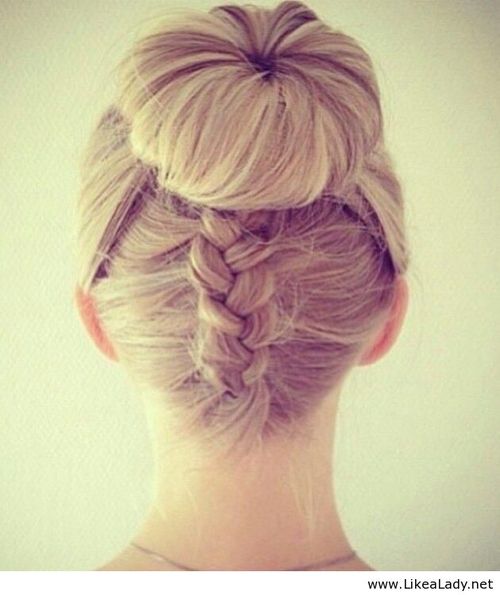
Back Braid Bun
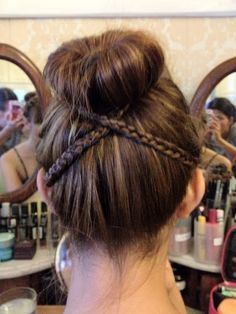
This bun is super easy to achieve and looks super cute in class and out. What you do is take 2 reasonably sized pieces of hair from around your ears and clip them away. These will make the braids. (you can see where the braids come from on the model. Now gather the remainder of your hair into a high ponytail (not on top of your head, you're not Cindy Lou Who or Pebbles from the Flintstones) and make your bun. Then braid those 2 sections you had clipped away, rather tightly, and secure with elastics. You could make the braids before you make the bun, but i find that the braids are neater when done afterwards. Take one braid and wrap up and around your bun and pin away. Do the same thing with the other braid and you're all set.
Wrap Braid Bun
This one seems pretty self explanatory. However, if you have troubles with your hair in general and even the easiest things seem tricky, then let me be of your assistance. When making this bun, it is easier to make the braid with the hair at the bottom (underneath) of you ponytail. Then it won't look as weird. Also, what is with people securing their braids with a bobby pin? I mean i love em and use them for bookmarks but for the love of Gandhi, PLEASE tie the braid off with an elastic. (in case you're wondering, Gandhi is my God basically so i will use that expression alot) What also helps is bobby pinning the braid to your head so you can make the bun and not worry about it getting in the way.
What Even
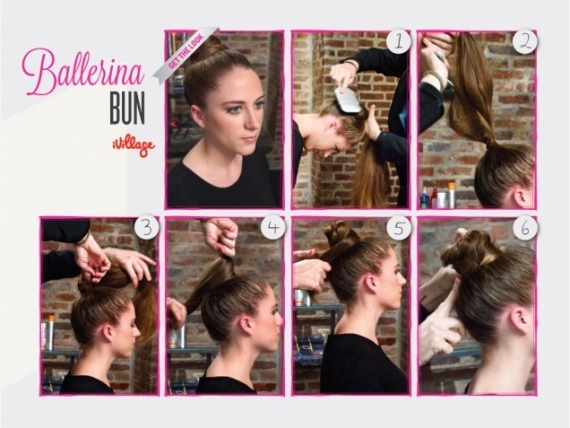
Just kinda felt like adding this. This technique is terrific for a messy bun. However, when making a ballet bun for class or an audition or whatnot, make sure you squash down the top (see you can see where it looks like a muffin top) before you wrap the hair a second time around. 2 layers of pins is OK.
Fishtail Bun
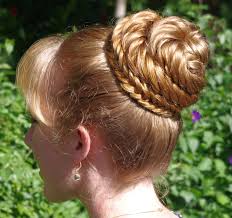
This look is super easy (if you can fishtail braid but pfft details) If you have super long or thick hair you may want to try one fishtail braid. Otherwise, stick with 2 like on the model. Simply tie them off and wrap them around each other and pin them down. THIS IS THE ONLY TIME I WILL LET YOU USE BOBBY PINS INSTEAD OF U SHAPED BUN PINS TO MAKE A BUN. Just needed to be said.
Braided Bun
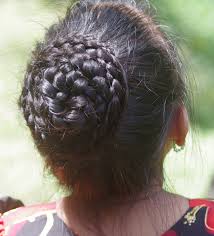
Basically the same as the fishtail bun except with tons more mini braids and bobby pins can be used as well.
Upside Down Braided Bun
I'm going to be straight with you, braiding hair upside down is really tricky. So instead of me telling you some useless crap i made up because i can't do this hairstyle on my own, please take away from the pictorial what you will.
Other Bun Stuff
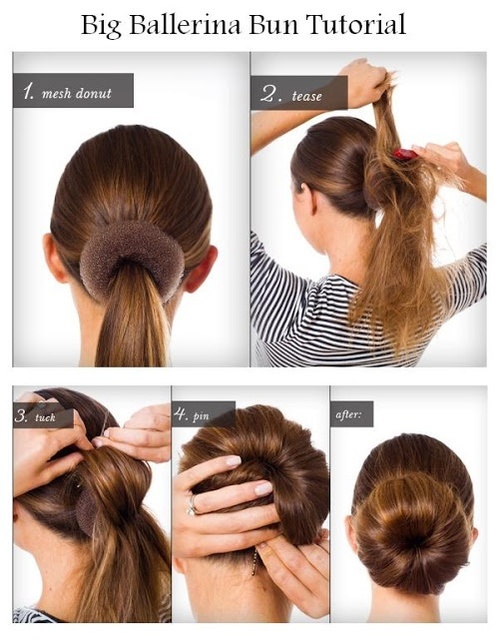
What also works with this is instead of pinning down each little piece, spread the hair evenly around the doughnut or sock bun and place another hair elastic on top. Then simply pin the hair around and voila!
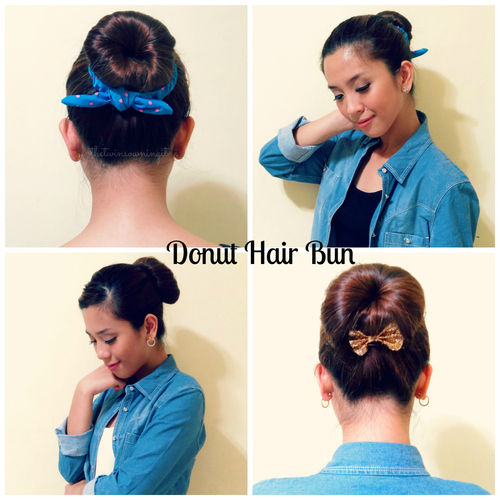
You can also add cool hair accessories to your everyday bun. I personally have 12 sparkly flowers of various sizes and colours and a few huge bows bigger than my head. And this onE HUGE PINK PUFFBALL THAT I BOUGHT AT A STREET VENDOR AND I ADDED GLITTER AND IT IS LIKE THE SIZE OF MY HEAD AND IT'S LITERALLY JUST FLUFF ANd freak out over.......
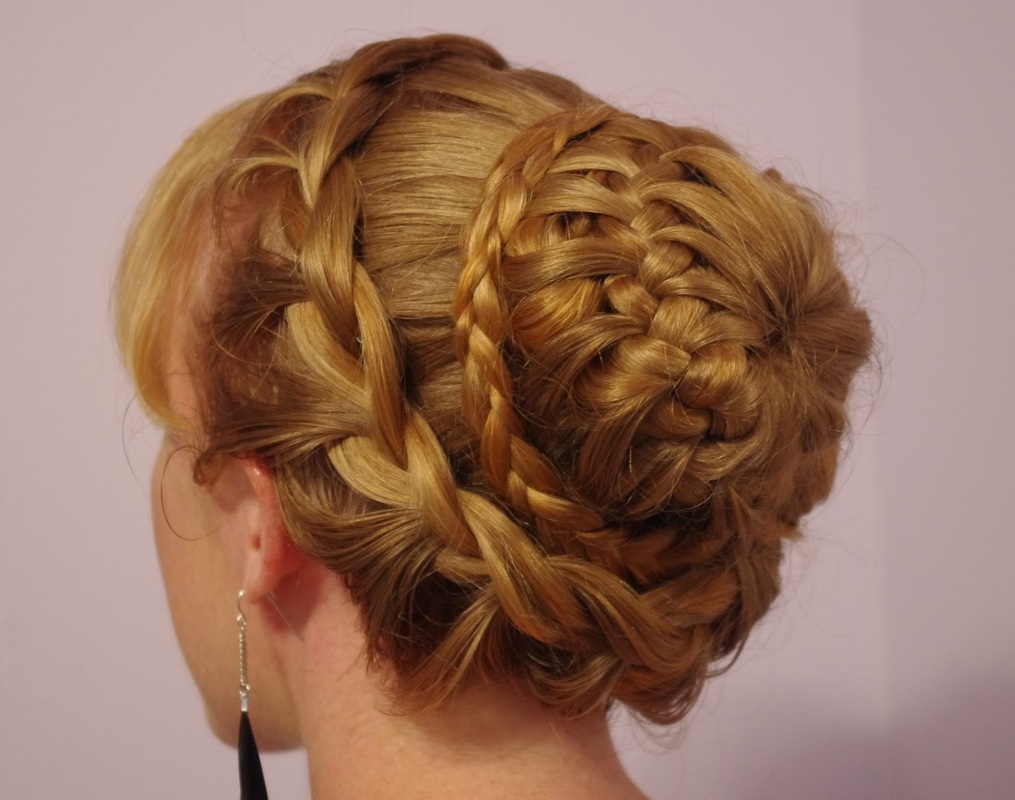
If you're really good at doing hair then you might want to attempt this look. I don't even know where to begin but it look pretty on google so i thought why not.
I hope this has helped you in any way you might have needed it and i hope your hair doing days are full of SPARKLES <3
I hope this has helped you in any way you might have needed it and i hope your hair doing days are full of SPARKLES <3